Here’s a fun project I’ve always wanted to do.
The problem: Every spring and fall, I’ve wanted to save on energy by leaving the window open over night to cool down my home. However, I often woke up to pretty cold temperatures inside the house.
Now, how awesome would it if without using much power, fans, or the AC, I can adjust how much air comes in through my window? How about building a part that opens and closes its windows automatically based on a room temperature I set?
The solution:
Here is a part that gets installed where a window AC or vent fan would normally get installed. It has three mini windows that will open and close using a servo motor on the side, using a linkage arm for the windows, and some temperature sensors and an arduino to control its movement.

For this project, I went with using clear PVC for a few reasons. One, its mostly see through. Second, it will survive a wide temperature range and would be resilient to warpage due to moisture absorption.
I designed the part to to fit within the dimensions of the cutting area of the WAZER. This also worked out for me as it fits perfectly in my kitchen window, and can be adapted for my other rooms (which have wider windows, but the idea would be to use additional clear pieces as bellows, or to just put plastic bellows in. I opted to use additional clear pieces as I want to preserve my view out of the window).

Here I have the base sheet to cut out my window flaps, linkage, and linkage attachment tabs.
Unfortunately, I could not reuse the leftover pieces of this as my window cutout because I had to put bevels around flaps to be able to fully close and open the windows.
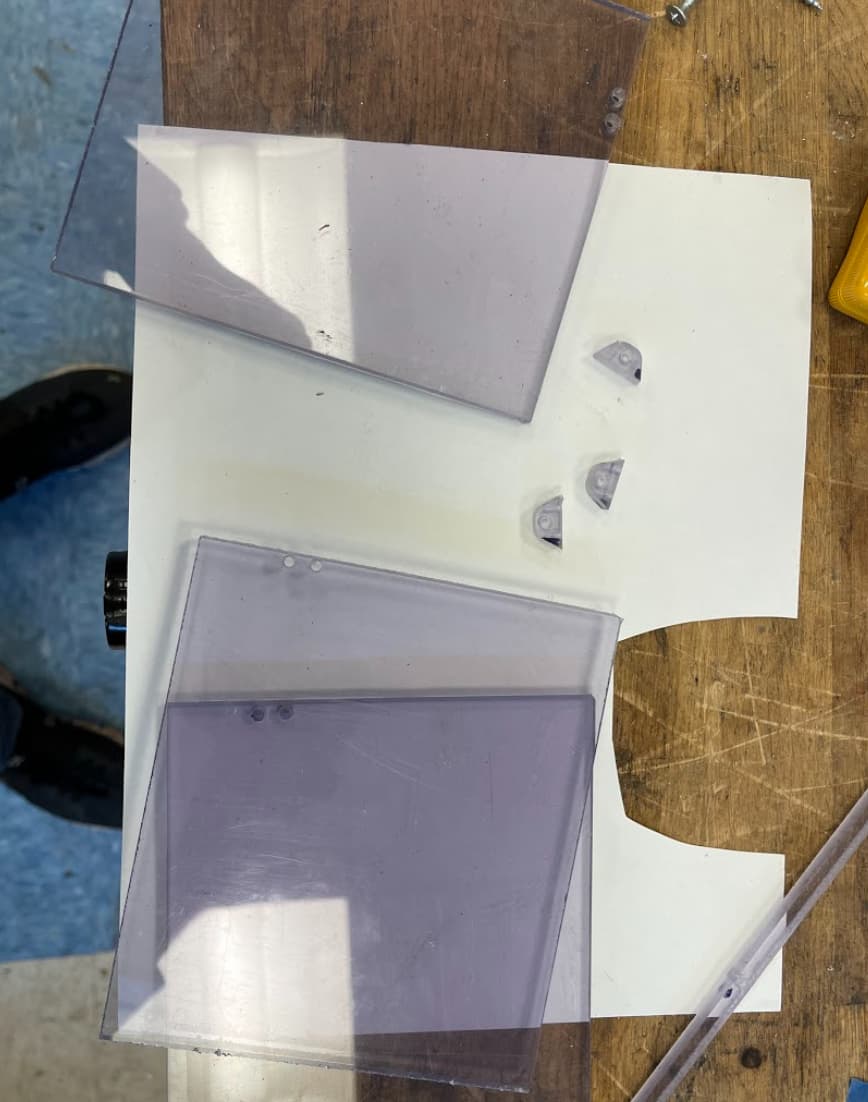
I added bevels to the sides of the window flaps using a router.


For the holes cutout automatically on the pieces, I just used the pierce function of the WAZER and WAM. I then drilled out further to larger diameters that I needed. I could’ve just used the WAZER to cut the holes fully but at the moment I was unsure of the bolts I would use.
The difficult part of this project was drilling the holes through the thickness of the material to pin the flaps to the base. I totally botched one of the flaps and drilled on a bad angle. But since the material is PVC, there is enough give on the linkage to not cause any issues.

Here’s the parts cut, processed, and ready to assemble. Notice the bevels on the windows to allow for fully closing of the flaps. Also notice my botch job of the pin drilling routes.

Now with everything installed, all that is left is to mount the servo motor (I went with a 9g arduino controlled servo motor), wiring up with an arduino board and two sensors* (I went with temperature and humidity sensor each), and programming the board.

*I used two sensors to measure both the outside and inside temperatures. This way if the temperature is too hot inside but hotter outside, the windows flap will stay closed, and vice verse.
Final Product, as installed in my kitchen:

Open configuraion

Mostly closed configuration: There is slight misalignment issues on the left window as i butchered the pinning operations and has some adjustments to be done.

Added benefit: This installation still allows me to look out the window and not lose my view.